Classify Text
Classify Text integrates the functionality provided by the Text Classification API, which allows you to assign one or more classes to a document according to their content. Classes are selected from a previously established taxonomy which can come from a well-defined standard or from your own definition using the classification models customization console.
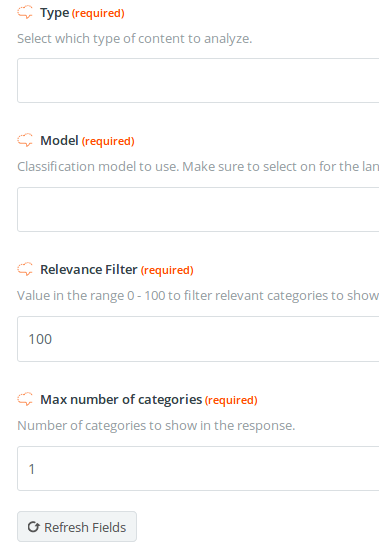
On the right, you can see the interface that appears when you select the Classify Text action.
There are four elements in the interface: Type, Model, Relevance Filter, and Max number of categories.
- Type, to select the input type to analyze. There are two possible values:
- Text: if you want to select a text to be the input.
- Url: if you want an URL to be the input.
Depending on the value selected, an additional field will appear to include either the text or the URL to analyze.
- Model, to define the model that will be applied to classification, that is, the criteria. The list of models also includes the user classification models defined in the classification models customization console associated to the MeaningCloud account connected.
- Relevance Filter, to select the minimum relevance of the topics shown in the output. Must be a number in the range of 0 to 100. By dafault, the filter is set to 100.
- Max number of categories, to select the maximum number of categories shown in the output. By default it's set to 1.

Output
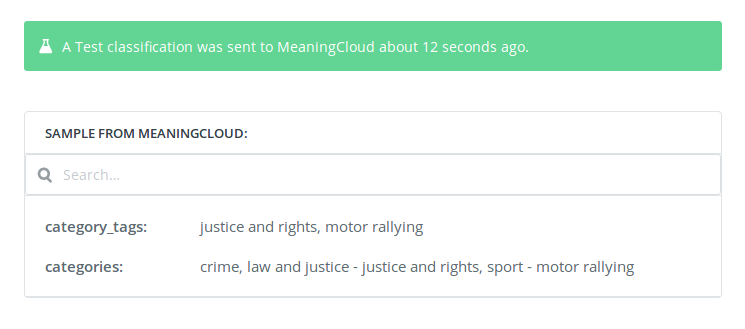
There are two different fields in the output of the Classify Text action: categories and category_tags.
- categories: this field returns a list of the categories found in the text separated by commas. In this list, the entire category label is shown.
category_tags: this field returns a list of the categories found in the text separated by commas. In this list, only the last step of the category hierarchy is shown (for the taxonomies provided by MeaningCloud).
In the next image, you can see the results of testing the app in Zapier:


