Data Input
To carry out an analysis, you need to define the data set that you are going to analyze. For this purpose, all the interfaces of the different analyses have a "Select cells with texts to analyze" section. Its structure will be always the same: there are a series of checkboxes that you can check or uncheck depending on how you want to introduce the input data.
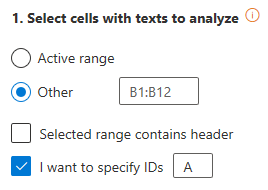
This is an example of a possible data input:

The selection of the texts will be done by selecting a range of cells in the spreadsheet. To do so, there are two possibilities:
- Active range, which sets the current selected range as the data source.
- Other, which allows you to define the data range by yourself. The range established can be any number of cells, but they must be in a single column, expressed in A1 notation.
Example: A1:A35
For both options, you can specify if the range of data includes a header.
Additionally, it's possible to specify an identifier for each one of the texts that are going to be analyzed in order to unequivocally identify them in your system. This is particularly important since the result will be displayed in another sheet. To do so, you just need to specify the column in which the IDs are located (one or two letters that refer to the column where the IDs are).
If you select "I want to specify IDs", a text field where to introduce the name of the column containing them will appear.
Example: A
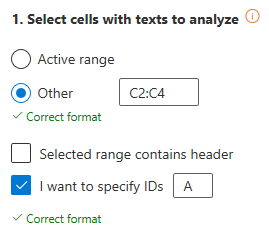
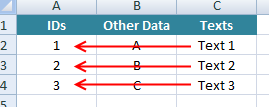
For instance, if you configure the input as in the image on the left, then the IDs will be selected as shown in the image in the center; the image on the right shows the IDs as they appear in a new sheet after the analysis.

 Input selection with IDs
 Output with IDs

